Monday, November 11, 2013

MY 12 DAYS OF CHRISTMAS CHALLENGE PROJECT

DAY 1  Here is the second composition journal cover I did. My first is the second picture and has a Halloween theme. I was on such a roll from making a few Halloween cards and items with my grand daughters and had lots of "leftovers", so did the journal cover with them. Then my DH said, " Isn't it supposed to be the 12 Days of Christmas"? SOO I flipped it over and did a partridge in a pear tree. The background is my new Martha Stewart flower quilt punch anywhere punch. My 7 yr old grand daughter figured out the magnet mechanism for holding the paper in place. We  had a fun time with it. I looked on line and got my own idea for the tree, the partridge, and added some leaves on top of the flat tree for texture. I gave the  partridge a little glitz with Stickles on its back and the pears are pale green glitter paper.

This is the first attempt at the journal cover and I liked it and did not want to throw it away, 
although I am not usually a big Halloween fan. I do however
like all the fun food that you can have at Halloween. So I will keep the fun recipes in here on this side, and use the other side for Holiday Recipes. The main Pumpkin image is from a wood mounted stamp, the cats are a cling border, and the small images ( bats, ghost, spider and web ) are clear stamps, and the big Jack O'Lantern was made with the Martha Stewart Pumpkin features punch anywhere on the page punch. I cut the pumpkin free hand and the one side is a little lopsided, but hey, pun'kins are not always symmetrical and round...just like people! LOL! I kept the colors true with orange, black, purple, white, and a little lime green and blue in the buttons. I added a Washi tape border on three sides to mirror the dots elsewhere. It was fun.


Day 2 My card is an example of the mosaic technique. I used a variety of design paper to make my triangles. I added a shiny gold star at the top and round red bling scattered on the triangles.. This is simple enough for a young child to put together or when you need to make lots of Christmas cards. I think it needs something but not sure what.


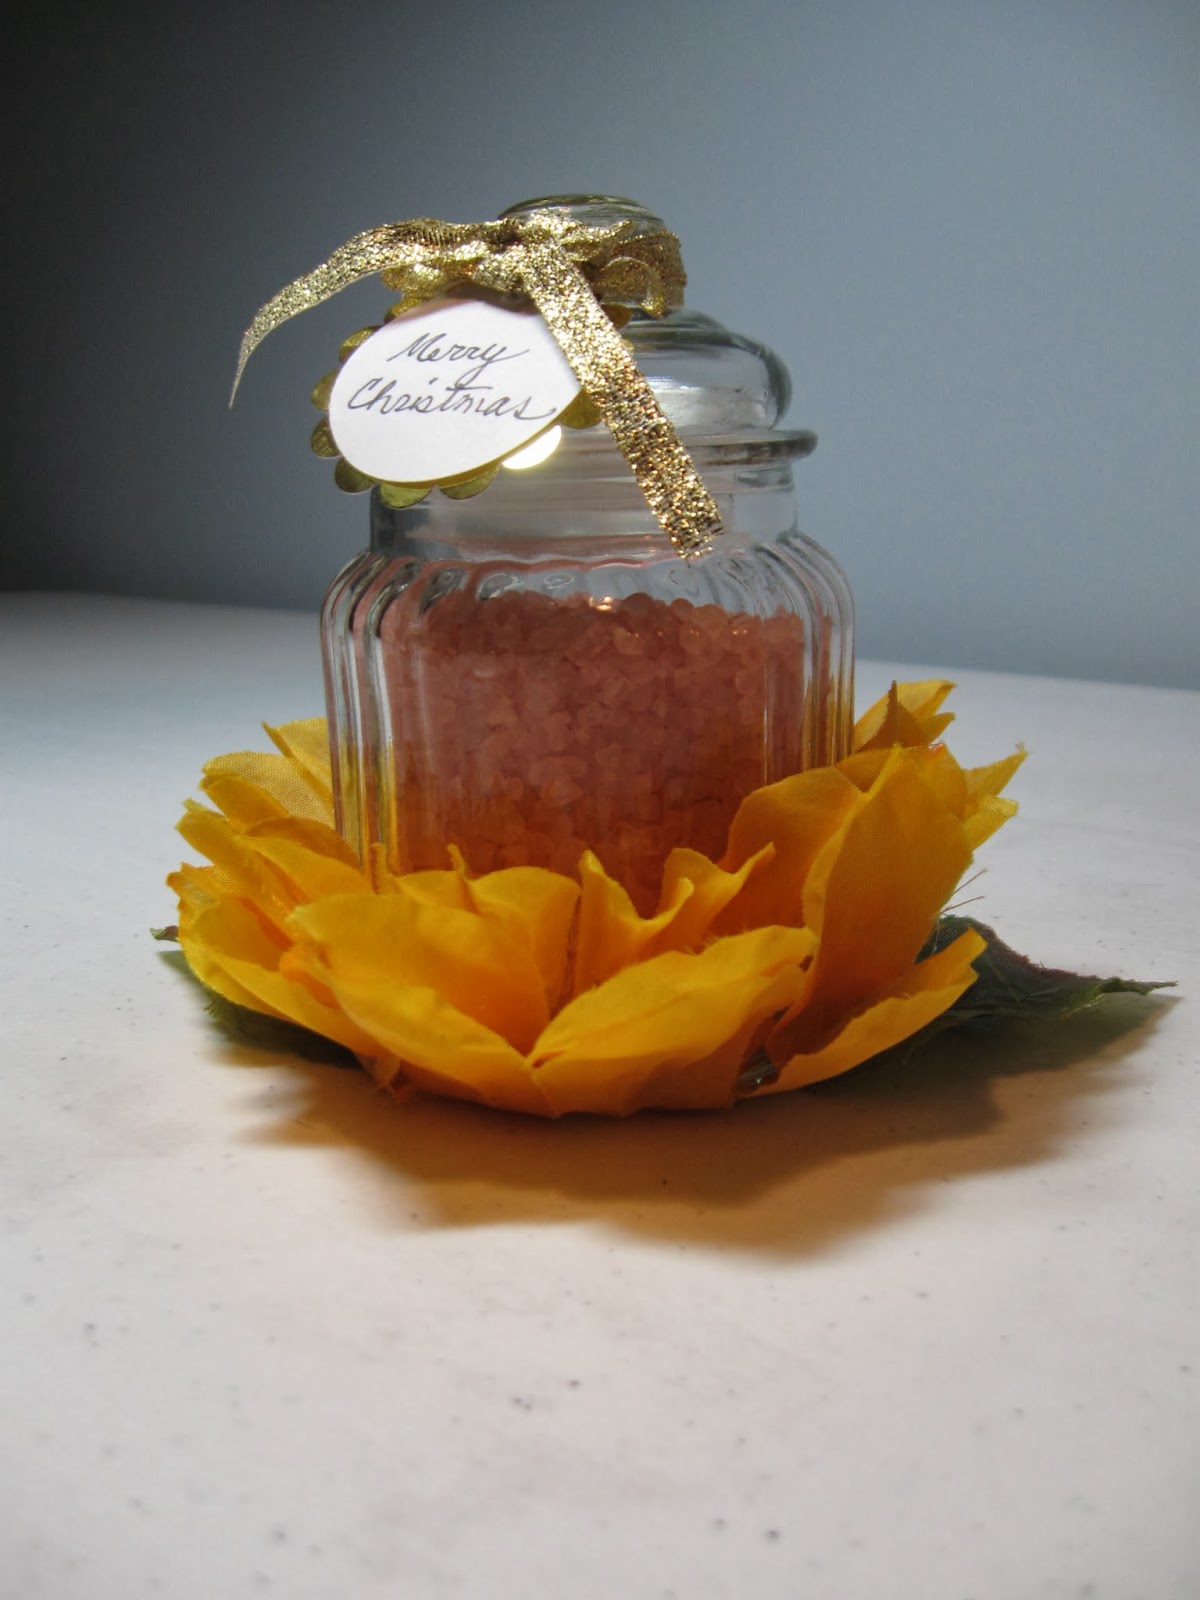
Day 3 Bath Salts gift in a decorated jar. This one was not something I would normally do since I only take showers. But I had my idea right away and bought the large yellow silk flowers at the Dollar Store, cut them apart and hot melt glued them on the base. The gold ribbon and Merry Christmas tag makes it ready to give away.

Day 4 Everyone loves Post It Notes and making a cover to make this one extra special was fun. I decided to use one of my new We R Memory Keepers tools which makes small gift boxes that close with punched out corners that over lap and hook together. I used only the corner punch feature with the hooks.. I also wanted to use some bright colored card stock. Mine is double sided and some of the red shows from below. I added a scalloped circle and hand wrote Thanks and added some bling to mirror the dots in the paper. I know someone who loves these colors...shhh....don't tell!
Day 5  3-D gift tags  Boy, I goofed this one up a little. Yes, my stars are 3-D but I made ornaments and not gift tags. I cut 4 of each paper star. I have a red glitter paper star, a shiny gold, a green glitter paper, and the last one is made from primitive print papers and I added crystal Stickles to the edges. It is the one to the left. I could still add a tag to these and they would be fine.


Day 6 Candle gift in a mason jar. This too was not something I would choose to do since we have 3 cats and I do not use candles much. I used hot melt glue to stick the ribbon alternating around the sides leaving a goodly space to let the candle light show through. I added the red lace collar and green satin bow. The circle from the lid was removed while the candle was lit and Epsom salts holds the candle in place.

Day 7 Mouse Trap refrigerator note holder. Painted this with red craft paint and started adding things. I had some scrap pieces of red glitter paper and added one piece to the upper right corner and the other in the lower left. I looked my papers over and chose the trees to fussy cut out. I added the torn white snow banks after the trees and I added crystal Stickles to the torn edges of the snow. The ribbons on the "trap" were an added embellishment for some softness. Yes, it won't hold lots of notes, but what it does hold will stay up on the fridge. Magnetic  strips are added to the back for that purpose.

Day 8 Candy gift "stick". This puzzled me at first because I wondered what kind of stick was needed. But after I saw some of the samples, it is only a group of candy made into a vertical strip. I put candy canes on paper tress which were stick together with red double-sided tape. Each tree has a shiny gold star on top and a little bling scattered on the trees. Sorry the picture is small. I added a folded scallop at the top to look a little like snow. Very easy . I cut my trees by hand but if you have a tree die or punch, it would go faster.


Day 9 Craft stick sled All I had was wooden coffee stir sticks which are narrower and thinner than craft sticks. So I went with them.I used hot melt glue to hold them together. I painted them white and added some white sparkle paint on top. I was stumped as to what to put on the top until my DH related a story about the movie "Citizen Kane" in which the main character played by Orson Wells dies at the beginning and his last words were"rosebud". The whole movie they are trying to figure out what he meant by "rosebud" and what significance it had.I won't give the movie away but the audience finds out at the end what it meant. I had just bought some pretty little roses recently, so added one to my sled, along with some pieces left over from using a Cuttlebug die, and added the red/white bakers twine for the rope. Kind of different and cute as an ornament.


Day 10 Salt dough ornament. I have heard of these before but this is my first time trying the recipe out. (1 C flour, 1/2 C table salt, and 1/2 C warm water.) At first I was going to make Santa faces since I have a stamp with four squares with four different facial expressions on Santa. But I could not find that stamp and instead decided to use the snowflake retired set from Stampin Up. I cut the rectangles and then stamped lightly right on the "dough". The  top two I experimented with the edges using the tines of a dinner fork. After they are baked at 200 degrees until dry (mine took 3 hrs), I painted them with some pale ice blue H2Os. the bottom row I tried out some 12 Days of Christmas cookie cutters that I have had for years. I experimented with coloring with markers and the light blue is again H2Os.The hanging holes need to be cut out while the dough is still wet using a straw.

Day 11 Banners  I made a simple card using some scraps of green and red paper. I added the chalk board inner triangle and added the white chalk letters to spell JOY. the sentiment is a clear one from a new set of lots of Christmas sentiments. I added the bling between and the red/white bakers twine for the hanger.


Day 12 Mini album made from toilet paper rolls. Not sure why, but the toilet paper rolls from Wisconsin are a bigger diameter than our MN ones, So this craft had lots of room for inserting a card. I covered each flattened roll with patterned paper. I punched two holes in each and hooked two "O" rings in the holes.. I decided to make a Memorize Bible verses album. Each flattened roll has a white card inserted with a Scripture written on card. The bottom of each card has a pull out tab. There is room for 6 verses counting the front and back of each card. They are printed so my grand daughters can read them easily. I added the heart on the front with the gift paper because Jesus loves His creation and died to provide a way for us to be forgiven and be with Him eternally. He is the ultimate Christmas gift for all who would believe. This is my prayer for all, that you seek the living Word of God, Jesus Christ, and make Him your Lord and
savior, asking for forgiveness of your sins, and following Him and trying to mirror His example as recorded in His Word. God bless you all.

Saturday, November 2, 2013

AUTUMN MISTS


Hi  family, friends, and followers,

We are in the cold rainy throws of Autumn. Nice napping weather. I often hear the Canadian geese over head. They stay up north all year and are I think, beautiful birds. Hope to do some watercolor paintings of them some day. It is on my bucket list.

We had a nice early Thanksgiving dinner with our son and  his wife's family today. The  turkey was cooked in the Green Egg and had a slight smoked flavor and was moist and tasty. Lots of the traditional side dishes and lots of good conversation. We will redo Thanksgiving over in MN the end of the month.

I have made a couple of cards and presently working on 12 items for a challenge called The 12 Days of Christmas. Need to finish by Nov 11 to compete .Here is a BD card for my exchange student/daughter. The Halloween Step card is  also a birthday card for a friend whose BD is Halloween.

Sorry my photo skills are so poor and the pictures small. Maybe I should add that to my bucket list too.
The floral card went quickly once I had the background paper chosen. I really liked the colors, but altered the look a little with a bit of spritzing with Pearl Glimmer Mist, that does not show in the picture but gives a shinny pearlized surface.  I had to weigh the wet paper down to keep it flat and let it dry. Then I added the vine in a green print and primitive hearts for flower buds. I cut the sentiment panel with a Spellbinder and edged it with some Baroque Burgundy ink. I used a grass green for the mat.  I added two small hearts and a bow to finish it up. Hope you had a wonderful birthday, Krissia.

The Halloween BD card took a little longer with the step cuts and folds and lots of parts to color and cut out. The main picture of pumpkins with the Trick or Treat frame is from Rubber Stampede and called Pumpkin Patch. The row of cats on the middle "mountain" is from a cling set whose name escapes me right now. The ghost, bat, "BOO" (which I added DAY to ), the spider web and spider and Happy Halloween all come from a Paper Smooches clear set. The tree with owl is from Hampton Art called Spooky Tree. I just colored the big moon behind the tree for color on that side of the card. "Necessity is the mother of invention". I added the bat for the same reason, and when I made another card just like it in yellow. I added a second spider web to the bottom left to cover that blank space. The grass is a Martha Stewart punch and I used Stampin Up markers for all the coloring.

Hope I can keep up with my blog. I have a new Touch Screen PC and things do not work the way I remember, so this old bird is having to relearn a bit and DH help often. Thanks dear!

Thanks so much for checking in to see my creations.

Be blessed, Martha


Monday, October 21, 2013

NEVER GIVE UP

Hello family and friends,

This is my first post since Jan 2012. Yikes, where has the time gone. I have communicated with most of you in other ways. My  poor old lap top  has been neglected for 5 months and not even plugged in during that time. My only excuse is that I have had more surgeries since then, 9 within the last three years, That is a lot for any old person my age. But I am relatively pain free, and able to function fairly normally, although I am not and never had been a runner LOL Just ask the coach of the neighborhood ladies soft ball team I was on years ago.

This summer began with my left knee replacement, which turned out well and I have 98% range of motion which is really good. The 12 days in rehab and the 12 weeks after going to rehab once a week really worked in my favor. I am the poster child for joint replacements!Then we went through  Bill's prostate cancer in July with it being contained and removed, and I had breast cancer found in Aug and removed and not spread anywhere.  I will need to take Tamoxifen to keep it from developing at another location in the breast. Mine was called ductal carcinoma in situ and in women my age is considered non invasive when removed. They give the med if a  woman has the DNA hormone receptors and I do, It will block hormones from causing this again. So I am a survivor and count each day a blessing.

I will try to post a card soon. Thanks for your patience and for stopping by.

God bless you all! Martha

Tuesday, February 28, 2012

I'M STANDING UP...

There is an old joke about a little boy at church but I am going to switch to little girl. The mother keeps telling the little girl to sit down on the pew and the child keeps standing up. Finally the mother speaks in her authority and tells the child to sit down. The girl sits down but says, "I may be sitting down on the outside, but I'm standing up on the inside."

Doesn't that sound like most of  us at some point in our lives when we can not have our way and yet we still hold onto what we want in some fashion. I recently had to make the decision for my mother to go into Assisted Living. I had help with my sister and brother concurring and the rehab hospital telling mom she could no longer live alone. She fell in Feb right after my visit from 14-21. Her leg muscles have become weak enough that she can no longer walk and must get around with a wheel chair. I found out she had been falling on a regular basis. but she has strong bones and did not break anything. But one of these times she could have hit her head and be unconscious for days. She has refused to wear a Life Alert button. She has Parkinsons and we believe it has progressed now and affects her leg muscles. She is a strong person, her mind is good for almost 91 and she likes making her own decisions. She THINKS she is going to drive again...hence the joke about the girl "standing up on the inside".

Bill and I flew down the next day after her fall. He stayed a week but had to get back to MN because the neighbors were caring for the three cats and we did not want to impose any longer. I stayed 5 weeks; Bill took the cats to WI and our son took care of them while Bill came down again for a couple of weeks. During this time mom was in a rehab hospital and I was researching the Assisted Living facilities in the area. I picked a small one that only has about 50 residents. I thought it would be easier for mom to get to know people. Her room is not too far from the dining room and she can almost get there herself in her wheel chair. She is still having therapy, and they monitor her meds, take her to doctors appointments and such. It has been almost three months and she has adjusted to her new living arrangements pretty well. She doesn't like some things, but her basic needs are met and she is safe. She still insists on going to the bathroom alone and NOT calling for help (more of the stubborn little girl showing).

We then came home for a month and needing to clean her house out so the painters could work and get the house ready to sell, we had to make plans to return to TX. We did not want to put the cats through the stress of being boarded or the expense. We decided to rent a 26 ft RV and drive down. Bill did all the driving and as soon as we were there we started the task off emptying cabinets and such. Beth came from  TN to help for 5 days or we would not have been able to finish. But the job is done, the house is freshly painted inside and out, and we even had them put in a wood laminate floor in the great room/kitchen area and down the hall.That was finished this week and next week the carpet cleaners come to clean the bedroom carpets and the indoor/outdoor carpet in the little office.. Then the cleaning ladies come next Thursday and do windows and make it look nice everywhere. Hopefully a buyer will see the nice improvements and not notice the small imperfections. The house is 25 years old and needs lots of TLC but it is a solid house in a good neighborhood and houses are selling in TX.

Mom has now been in assisted living for 1 1/2 years and doing as well as could be expected. she has to use a wheel chair to get around, falls occasionally and is in a safe environment. She will be 92 next year.Her house sold within a week of being on the market. Must have done something right.

This is an old post that remained a draft for over a year. Not sure where it will land in the lineup but it has a date and maybe you can line them up when you read them for sequential continuity.

Martha

Wednesday, January 25, 2012

PASSWORDS, ETC....

Hello my few faithful friends! I know, I know! I have not written on my blog for EVER it seems like. It has been so long I almost did not remember my password! But I am still here, or at least most of me is. Jan 4th I had my left shoulder replaced and WHOOPEE! I am pain free! I can not begin to tell you how good that condition feels. I am three weeks after and have one more week to wear the "sling". I am supposed to wear it 24/7 but I keep the arm propped on a little pillow when sitting in my recliner and that gives me a break. I also sleep without it a lot but I am not a wiggler and there isn't much room to wiggle in my chair anyway. Friday I begin therapy once per week and that will help me progress quickly. I have 90/95 % of my right shoulder range-of-motion back, although I am not supposed to lift heavy things. I hope to go to the YMCA and strengthen all my muscles as best I ca later. I am beginning to have occasional pain twinges from the left hip and knees. But I am hoping they hold off a long time so I can just live without pain, surgery and nursing homes on my plate.

Bill is my Knight in shining armor helping do the vacuuming, laundry, and emptying the dishwasher. He also helps with the kitty litter and lifts pans full of water etc. We work together for meal prep when needed. Love him to pieces!Thanks !

My incision must be healing because it itches right now under the steri strips. But I am OK with that since it is so much better than pain. I only had pain meds for the first 6 days and have had nothing since! That is a blessing for sure!

Attended a Valentine Showcase which was offered free by my local Archivers on Monday.We had 3 inches of new snow in the early morning hours and I was the only one of four who showed up. I was able to get to know the demonstrator and learned she also is a Christian, a pastors wife and has a house cleaning business. I wrote her name and number down for future use. LOL!

Of course I had to get a few of the sweet stamps that were used and most everything I bought was geared to Valentines and spring cards. Hopefully I can get some finished and posted before the 14th.

Hope all is well with you. Thanks for remembering me and stopping by.

Saturday, December 3, 2011

ANOTHER PIECE IS GONE

Hello out there in blogland. Martha is getting smaller/thinner/ tinier by the surgery. YEP! Another piece of me old bod is gone for good. I had my gallbladder out this past Tuesday and have been trying to figure out what I can eat successfully the last three days. They say if you eat too much or too fat of foods too soon, it will not digest properly and zip right on through the system. AND I do not want that for sure!

I did not get a picture of my GB to share...I was busy sleeping. LOL! I will go to the doctor in another week and find out how it all went down and what they learned from it. I do know I had gall stones and that was what was causing my pain and discomfort.

So goodbye to another piece of me. I tell people that "God is taking me home one piece at-a-time! Thanks for stopping by.

Friday, November 18, 2011

MINTY...

Some may remember seeing the movie Beverly Hills Chihuahua. Remember the scene where the dogs after being taken to the hotel after running all over Mexico, and were given baths and teeth brushing...one of the strays smiles and his teeth sparkle and he says, "Minty"! That scene cracks us up every time.

Well, yesterday we took Jack to the vet to get his teeth cleaned...and I imagine he says "minty" every time I look at him now. I would take a picture of his clean teeth for you if he would let me. He was awfully wobbly last night and the two girl cats had thought he was gone for good and welcomed him with lots of hissing and growls. I imagined they said "Oh no, he's back"! He does give them a few running chases around the house. Mari hisses at him and growls but Luci seems to like to run too and will tolerate him a little before she stops and hisses.

After paying the vet bill for the cleaning, even Bill and I were hissing and growling. Hope we do not need to do it often.

Wednesday, November 16, 2011

A SWEET FRIEND


We have all heard the sayings, quotes and such about what good friends are. Some know our thoughts before we think them, some "walk in the door when others are walking out", and others hear and know our heart "song" when we can not speak and they do not judge us but accept. Some are just passing through and then they move on.

Sometimes our best friend is our spouse. Here we walk a fine line with telling them what to think and feel because we think we know what is in their mind and heart and know what is best for them VS really listening and asking what they need, want or feel and cherishing them for who they are. Those who have the latter for their spousal relationship are blessed. There should be a "oneness to a marriage" as said in the Bible when both are pulling the same direction. Friendship has a "oneness" to it too.

Some friends are people we meet along lifes road, and for whatever reason, there is a special divine connection sewn with kindness, acceptance, and a freedom to be who we are. Nothing is more special than to have friends like this but we usually only have a few. Those who have more of this kind are special because they attract and keep their friends. They know how to be a true friend.

One of my true friends is my CA friend. I talk with her long distance often (Glad we have cell phones with free long distance!) She never complains or gets upset, she always has a friendly "phone" smile and seems genuinely happy to talk with me no matter when or about what. We have never met face-to-face, but I hope to meet her in Las Vegas (which is the nearest air port for her) and spend a girl weekend hitting the craft stores and talking non-stop. And I will as soon as all my surgeries settle down and we can work it into her work schedule. She always blesses me with her positiveness and encouragement. Thanks so much Davi for being my true and special friend.

Her BD is the same as my daughters and since her gift is on it's way, I will wait to post this until she gets it. I hope she is surprised.

Her card was a simple one using a recently bought stamp off of Ebay, from Stampin Up 2001.( I do not know the name of the set this stamp originally came from. The wood block measures 2 7/8ths by 1 7/8ths and so is not a big stamp. If anyone recognizes it, shoot me an email.) It is a fall still life with a wooden bucket and some bitter sweet and leaves. There are three gourds in front of the bucket. Inside the card is a Double D stamp saying, which I stamped in a mixture of two colors, rust and cranberry SU markers. It says, "May your day be wonderful and special in every way."

Back to the front of my card... I used forest green matting, and was trying to cut some rectangles from (Bo Bunny Forever Fall 6X6 pad ) an orange/gold leaf print. As you can see...my four rectangles are not equal due to a miscalculation on my part (math was never my strongest class), but I decided to use the smaller ones on top and the larger on the bottom leaving the forest green around as a frame. And I think it adds more interest not being exactly the same! "Necessity is the mother of invention" in card making for sure and sometimes our accidents turn out to be really special. Especially when this card was being created just before midnight ...anything can happen at that time of night!

The image was matted in the same green and popped up. I distressed it with some Tim Ho;tz ink. The front "friend" sentiment was stamped in black using just part of a Michaels $1 stamp by Studio G. I punched it out with my SU small oval and punched the next size up out of the green also with an SU punch. I am so glad I brought them along from WI with me. I used a SU cranberry colored marker to draw a fine line design around the leaves on the Bo Bunny print to give it an extra design element and added three rhinestone jewels in gold in the upper right corner. I decided I did not like the "friend" black sentiment and drew over the letters to give it a cranberry coloring. I was going to tie on some ribbon, but honestly couldn't figure out where to put it, so I left it off.

Thanks to all who visit me on my little blog. I wax poetic and philosophical at times, but I do enjoy sharing. LOL!HAPPY BIRTHDAY DAVI!

Saturday, November 12, 2011

MY SISTER


Today is my sisters BD. She is 2 1/2 years younger and I am thankful for her. She has been through a lot in her life (a car accident leaving her to relearn speech, and many surgeries to regain her walking skills, and much much more. She never quite regained her original balance and requires someone to walk with her as she uses her walker. ) I admire her because she has maintained the sweet Spirit of her faith in Jesus Christ through it all. So dear sister, have a blessed birthday and many more. I love you!

She asked me to sew a little nightie for her and I did. It is still getting hemmed. I have a card for her to go with it. I chose a group of corn stalks with a checked ribbon as my image. I think it is a Dots stamp. I colored it with my Copics, added matting in tan and turquoise and a striped paper for interest. I used a Martha Stewart corner punch for the one corner. I punched little holes and added five jewelry tags down the side and used small brass brads to hold them on. I wrote the letters for Happy on the tags and on the inside stamped in turquoise "...birthday to you". Hope you have a nice fall y'all and thanks for stopping by.

Thursday, October 27, 2011

A CUPPA...


While visiting the free card showcase at Archivers last weekend, I came across this really cute coffee cup stamp set to use as an image or as a gift card holder. I also can imagine a little creative cutting to make it look like a flower pot and flowers of any kind can be added. So here are two versions of it used as gift card holders.
The lids flip up to expose the card. TFS

A FEW HEART DROPS

This is an image from Penny Black and she is fun to color with Copics. I only used three colors (but several shades of those three colors) pink, turquoise blue, and yellow. I used a very light shade of pink behind her to make the image pop. That is a Copic trick so that it just isn't all white around the image. Kind of pulls it together. It is REALLY nice having so many shades of each color of the Copics. It gives me lots of options for coloring and blending, although my blending skills need much improvement. I am still learning at 69.

I adhered her on a turquoise blue mat, then popped her up on a light pink mat which has a punched Martha Stewart beaded scallop edge. I used a glitter dot CS in a deep pink under that and matted with a medium pink shade.

I used a hot pink heart button and used some pink/white bakers twine to tie on a small SU jewelry tag that says "friend". The upper right "needed" something and I had a short length of medium pink ribbon that I tied loosely and added on. Seems to help visually, I think. Guess this is my "pink" offering for breast cancer awareness month. Inside it says, "Rain or shine, you're a friend of mine!" And you "are" for taking the time to read my blog. Thanks.

WATERFALL CARD


Halloween stamps at Michaels were the inspiration for this Halloween waterfall card. They were cheap ones and can be used year to year and by the grand daughters. I have made a waterfall card twice before but it has been a while. I do not celebrate Halloween although I think it is fun to dress up in costumes and carve pumpkins and trick or treat with the little ones.

I have a really good friend whose birthday is on Halloween and so that became my reason for making four of this card . I had three other people in mind who might enjoy it. As you can see, there are four small images stacked so that they show halfway. They are matted in four different colors. They are attached to the pull tab and when you pull the tab, the pictures flip up and behind so eventually all four can be seen, one-at-a-time. The four pictures are: a black cat with gold rhinestone eyes, black witches shoes with legs in striped stockings (I covered the black shoes in Glossy Accents), a ghost with purple Stickles dots all around, and lastly "BOO!" with gold stones scattered. The pull tab has a pumpkin face pattern on black. I see that I have the faces up-side-down. : ) The other side is a stripe but doesn't show. The jack o'lantern band is matted to give it some stability and the front part of the tab is attached with double sided tape. I covered the card base with the green print which has spider webs heat embossed in black in both upper corners, and there is a plastic spider hanging down on the right. I tied a little orange ribbon on the tab to indicate it is to be pulled. All coloring was done with Copics and stamped with black Momento ink . I am sorry the little pictures are out-of-order and at different levels. My skills are woefully lacking in trying to get things to look a certain way or lined up. TFS

MY BUTTERFLY


Here is a blue butterfly from Northwoods MN stamp company that I love. Emma colored this one earlier this year. I don't think I ever posted my version of the image. So here goes...

I matted the circular image with a Spellbinders Large Scallop I cut out using my Cuttlebug. I used Copics to color the image and use a blue Spica gel glitter pen on the wings. I popped the circular piece up with pop dots on top of the pink back ground and green matting with a green satin ribbon and bow. It is a simple card, but lots of fun to color.

Wednesday, October 26, 2011

LOVE WATERMELON

This summer I think I ate more watermelon than I did in the last 10 years. Hubby does not eat it so when I get some, I have to plan. If I buy a whole one, I usually share half with our son's family or with church as a treat for fellowship. In August, I ate a whole big one all by myself over a week-and-a-half and I tell you...it was delicious! I drank some of it putting it in the blender.

Here is a little House Mouse card with mice eating watermelon and looking very happy about it. I so enjoy making House Mouse image cards. They are fun to color, very detailed, make me smile or laugh out-loud, and the best part is when I get to make them fuzzy by gluing on Fun Flocking in brown, black or gray.

I colored the image with my Copics, trimmed the image leaving a narrow edge of white, and matted in red and black. Inside it says, " Relaxing is Mice"! I should go back and add some shading on the sides of the picnic table boards. I did change the coloration around the mice to create some shading. I'm still new with the Copics and have to learn by trial-and-err0r. Hope you enjoy this image as much as I did making it. TFS

LONG TIME NO READ...


Hi there! It has been some time since I posted, about a month and a half. No, I did not go out of the country on vacation! No, I have not been sick (although that might be a matter of opinion.) We breezed through Sept while in MN and have been in WI for Oct. We have been able to keep our grand daughters over night twice, and they attended church with me twice. They seem to really enjoy coming with me and participating in Sunday School, the singing part of worship, and then their own children's worship. I so enjoy being with them.

My card making has been sporadic at best. I have several made this summer and then have made a few since. I will begin with the summer ones. The turquoise blue and green card was made using an image which is called a "reverse" image. The flowers, stems and white parts are the watercolor CS showing through because they are etched out of the flat rubber. The green and turquoise ink were applied to the flat background using markers and blended a little in the middle, then stamped. I believe I also spritzed this one with a little water to give a watercolor effect. I matted it on a piece of turquoise CS that was smaller than my card base on the sides. I punched the bottom edge of the turquoise using the Martha Stewart Vintage Floral border. I mounted it and there was a wide margin left on either side. I kept looking and looking at it for several weeks, and decided to punch the outside borders too and make the front of the card peek-a-boo. I kind of like how it turned out but honestly it just evolved...no creative planning or imagination...just trial and error. Sometimes that works. The inside is one of my favorite sentiments, heat embossed with turquoise.

Thursday, September 8, 2011

MY COPIC STORAGE SYSTEM


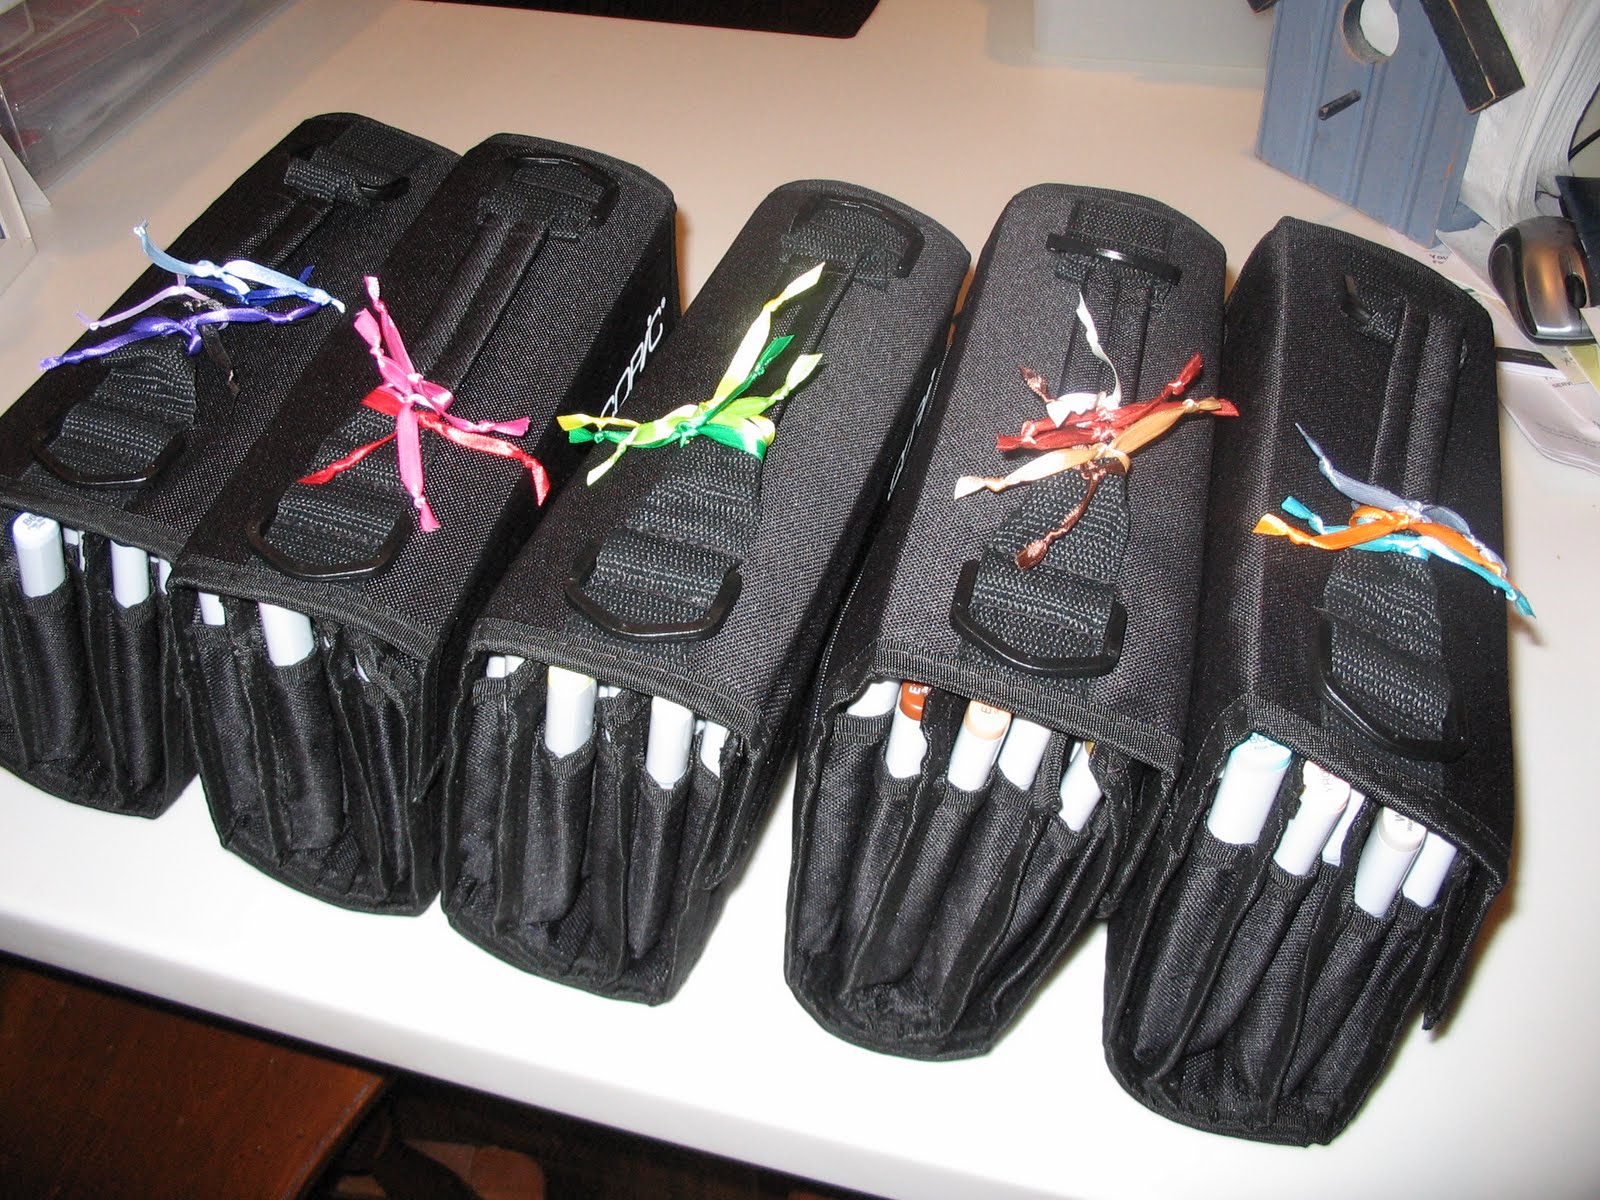
WOOHOO! Over the Labor Day weekend while Bill was in WI on a consulting job (helping our son install a range hood with ducting to have it blow outside instead of into the kitchen)...I took the opportunity to organize my 320 Copic markers into color families, arrange them by their numbers on the end, mark the brush tip ends with a permanent marker dot (so I could easily identify that end 'cause I use it 99% of the time) and I grouped them in groups as near to 72 as I could without going over. The 5 wallets each hold 72 markers, so they all had to fit.

Red is paired with Red/Violets and the 10 Spica glitter pens (R and RV)

Green is paired with Yellow/Green and Yellow. (G, Y/G, Y)

Blue/Green, Yellow/Red, and all the grays and neutral colors.(B/G, Y/R, Cool grays, Warm grays, Tones of gray shading. and Neutral grays.) I only have about 6 of each of the grays.

Blue, Blue/Violet, Violet, Black and clear blender pen (B, B/V, V, Black 100 and 110, and the clear blender pens)

Lastly are the ecru colors which is every shade from white to dark brown and anything with brown mixed in it. And this family of colors barely fit in the 72 pocket wallet. This has all the skin colors for just about every nationality. (Reminds me of "red and yellow, black and white...they are precious in His sight!")

On each wallet handle I tied a length of 1/4 inch ribbon in the colors inside that wallet. This was to help me identify where to look when I wanted a specific color. AND the system works really well. I hope to also buy or make a bag to carry all five wallets for when we travel between MN and WI. Or I might find a plastic bin just the right size. I carry everything else in plastic bins for traveling.

Thanks for stopping by. I hope you will come back soon. I am eating a big bowl of watermelon right now as I type this, enjoying the last of the summer season, probably.

THREE CARDS

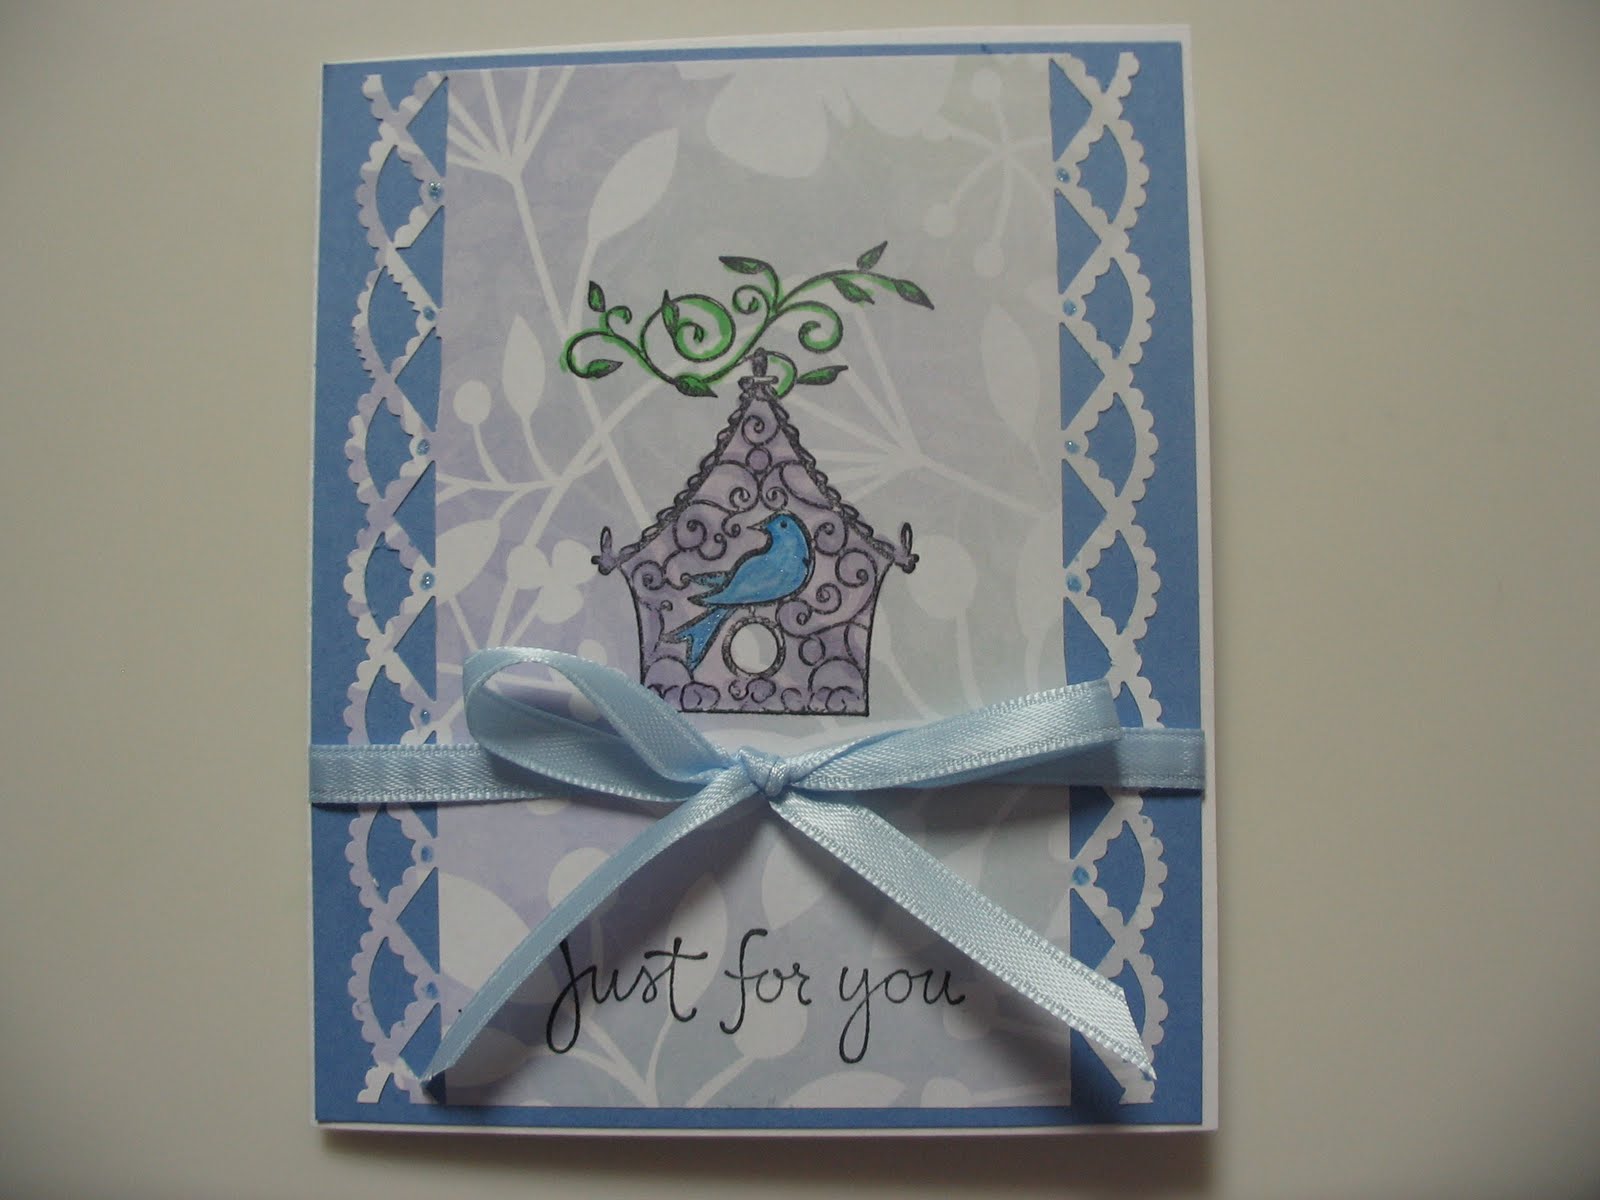
Here is a card for a friend who had shoulder surgery last week and I liked it so much, I made two more just like it...one for my mom as encouragement and one as a Thank You for my Scottish pen pal, Ann, who sent me some lovely goodies for crafting.

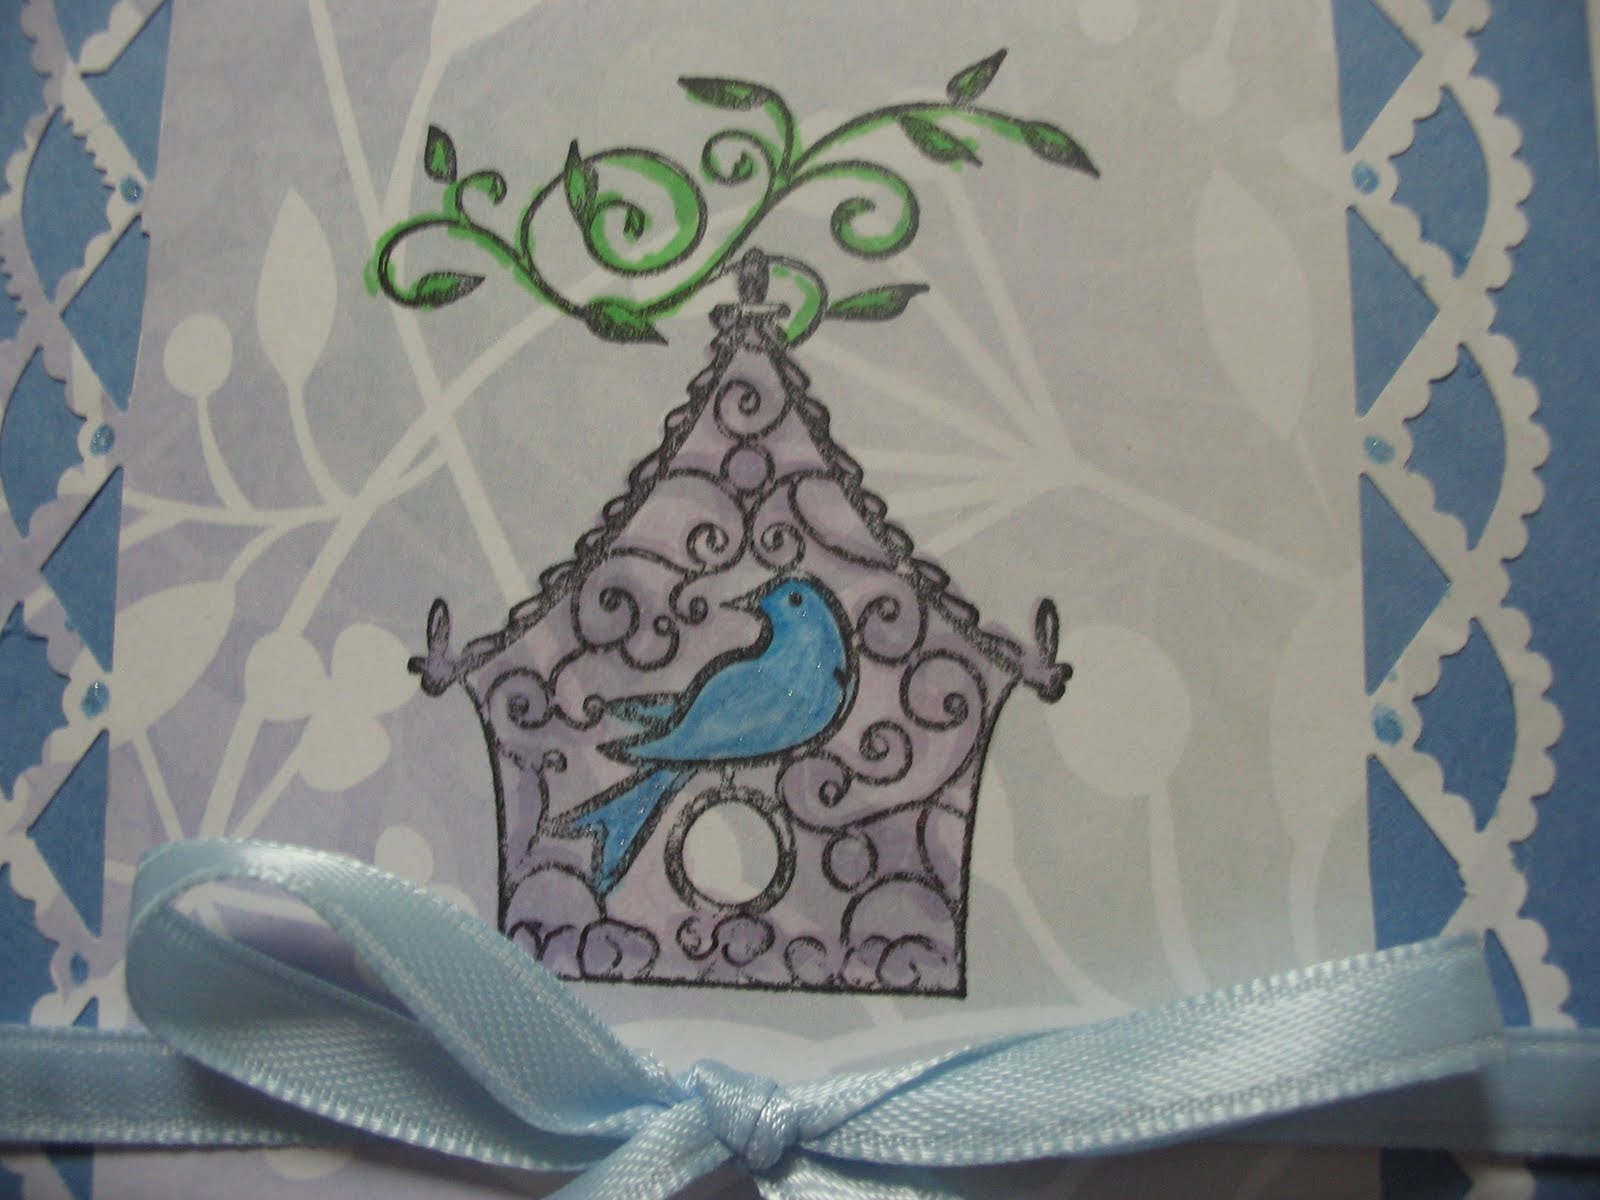
For the card I used a medium blue Bazzill CS called Wildberry. I took a sheet of lavender on white print and cut it to fit using the Martha Stewart Beaded Arcs punch down the sides. I stamped the Inkadinkado bird house stamp in Momento tuxedo black and I used Copics to color it a darker shade of purple with some purple highlights in the swirls. I colored the bird a blue and then gave it some sparkle with a blue glitter pen. The sentiment is from Hampton Art and was also stamped in black. I added the light blue ribbon and after the picture was taken (I forgot to take a new one!) I added some purple rhinestones to the four corners of the light paper. I also added some dots of the sparkle pen on the beaded arcs punched area. It was a pretty simple card and making two more did not take a lot of time. I need to push myself to make more cards more often. Each card has its own different message stamped inside..."Hope you're better soon", and "...wanted you to know how important you are to me.", the last two with a hand written personal message also.

Thanks for stopping by. I will try to make more cards to give you something nice to look at and a reason to visit my blog.

Wednesday, August 31, 2011

OUT SPOT

As you can read, I am a bit upset. I visited my dermatologist about a few spots on my skin. One turned out to be a small cyst which he removed. The other is on my nose and he has looked at it in the past and said it was nothing to worry about! Well, I felt it was growing and said I wanted it off...no matter what it was! So he cut off a chunk and sent it to be tested and low and behold...it is a basal cell carcinoma! Now I need to go back and let him cut some more until he gets "clean" skin. Not sure how big it has become inside my skin. And I am not sure who will be trying to sew me up and make it look as good as possible. What I am most upset about is his cavalier attitude and almost non-interest in it for the past few years. Had he taken a piece last year, maybe we would have caught it sooner. Not sure how to feel about it and if I should go to a plastic surgeon to have them do the work of the removal and repair. I only have tomorrow to decide and call someone else if I decide to go that route. So there will be NO pictures or cards with this posting. I am just venting!

Sept 8,20011
I wrote the above and did not call the plastic surgeon to see what I should do. I decided just to go with the dermatologist and hope and pray it won"t look too crooked and ugly after he is done. I even made a joke about "listing to the left" because my nose will be bigger and heavier on that side. LOL

Surgery is in an hour, and I will write when I get back home.

It is early evening and I sit here writing with a BIG white bandage on my nose. It took them two tries to get it all and 2 1/2 hours all total. He was going to sew me up but I looked at it, and it is a "crater" 1/4inch deep and about 1/2inch across. It is really big looking and I told him I wanted a plastic surgeon to fix it. So they booked an appointment for me tomorrow. At least it is not hurting yet. Not sure what tomorrow will bring.

So guys and gals, if you see a spot of anything growing on your skin...be sure to get someone to check it out. You never know! I just hope my nose is decent looking when all is finished.

Thursday, August 18, 2011

3 X 3 and BOTTLE CAP


I did make a small Thank You and tried out the "quilling" craft, which is rolling thin 1/8th inch wide strips of paper into spirals, gluing them on the end to maintain the spiral, and then making something from multiple spirals. Archivers was demonstrating this technique and of course now I want to get the tools, the plastic template for the different sized circles, and some paper and glue to be able to add it to my cards. Lucky me Archivers has a coupon good for the next few days and I will be able to save 30% off of part of it. I love coupons!

The card has a textured blue base, 3x3. The white center is masked with a big Post-It note across the upper portion which is slightly larger than the lower. I stamped the dots using Pumice Stone Distressed Ink from Tim Holtz. Then I reversed the masking and covered up the bottom and stamped the tree branches with a Hero Arts stamp using black. They had a thin strip of paper with adhesive on it and I covered up the line between with this slightly darker blue paper piece.

To quill, you stick the end of the paper strip into the slot on the end of the tool, and holding with the thumb and fore finger of the left hand, roll the tool in a circle (rotating the right hand) until all the paper is rolled. Then you slip it off into the size of circle you want it to be, stick a dab of glue under the end and let it dry a few seconds. The bird body was made from a slightly longer in length strip than the head strip. When both are made, glued and dry, you pinch the larger one to create the tail, rub some glue on the underneath edges and place on the card. The head is glued the same and a small piece of yellow is folded in half to create the beak and glued on. Thanks was stamped in black over the dots. It really is not difficult if I can do it with one and a half arms. Pretty simple card and the quilling is easy to do.

The bottle cap is metal, and you stamp a desired image on CS, punch out with a circle punch, use the tool that encloses the stamped circle and covers it with a plastic disc which snaps together and it is pop dotted into the bottle cap. Because of the heighth of the counter and my recent shoulder surgery, I did not honestly have enough strength to push down on the tool to snap it all together. So the demonstrator had to do that part for me. But it is made and a ring added to the edge to hang from a ribbon on a card. I realized after it was done that I should have centered the image with one bird instead of trying to get all three in it. Oh well, this is not something I think I will ever repeat, but it was a learning experience and free. Archivers has been having a free project every week this month and I missed the one at the beginning of the month. This week is using the Sew Easy tool for perforating the card stock and then doing a little embroidery on it. We will see if I can make it go in a straight line since it is a "wheel" and I can see mine going all over the place. LOL

Since writing the first paragraph, I have used the Archivers coupon and bought the template for the cirles, some thin paper, and a package of two tools to do the quilling. I also bought five small books off of Amazon with many ideas for me to use to add quilling to my cards. They have patterns and one included some brightly colored paper strips, glue, googly eyes and a tool. I will be practicing the next 2 weeks and hopefully get some cards done using this new technique.

Thanks for stopping by.

CAT PHOTOS


I have not made any cards since my surgery four weeks ago,and I thought you might like to check out the antics of our three cats.

Mari, our "ewes not fat, ewes fluffy" cat, likes to sleep in the card board box with all the cat toys. She is about 16 lbs and takes up 2/3rds of the box. Because I sleep in my recliner half the night (for a variety of reasons), I am aware of the cats and they often sleep near me. Mari also likes her cat bed too in the afternoon, but I think she gets too warm. I am taking the cat food up and trying to train them all to eat at meal times only and not snack all night. I am hoping Mari will loose a little. Jack tends to throw up at night when his tummy is empty and he tries to eat a little. There has to be a good solution somewhere.


Jack will usually be on the loveseat about 2 ft away sometime during the night, Mari will be in the toy box or sometimes on the back of the loveseat, and Luci likes my lap. She is our "heat seeker". In Oshkosh, she will get up on the back of the couch under the goose neck lamp. Her newest place is on top of my laptop on the kitchen counter. It too is nice and warm since I leave it plugged in all the time. Jack will often get up on the chair next to me as I type on the laptop, or he likes the top of the stair landing. He also likes the top level of our cat tower over in WI, so he is our height seeker. Amazing how different they all are.